How to properly mount a chain-link fence in a summer cottage
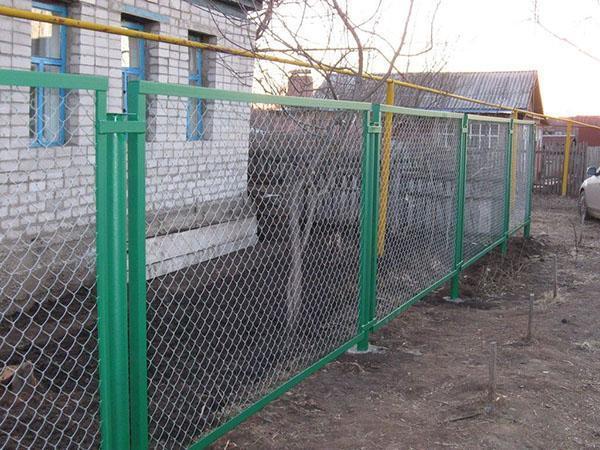 Installing a chain-link fence is the easiest and most inexpensive way to mark the boundaries of your summer cottage. A sufficiently strong metal mesh “saves” our compatriots when delimiting territories, since GOST prescribes to use only transparent fences between neighboring areas. Despite the outward simplicity of this design, installing a mesh fence with your own hands requires certain knowledge and adherence to the installation rules, which will be discussed in this publication.
Related article: how to make a polycarbonate fence in the country?
Advantages and disadvantages of a chain-link fence
There are many advantages of a fence made of this material, and one of the main ones is its cheapness. Besides:
- It is quite simple to make a fence from a chain-link mesh with your own hands, the design does not imply the presence of a foundation and a massive frame.
- The fencing made of this material has excellent light and air permeability. The last point is especially important in areas with significant wind loads.
- The metal mesh can withstand quite high mechanical loads.
An important advantage of chain-link fences is the high speed of installation. To create a reliable and high-quality fence of six acres, two people spend no more than two days. The design has shown itself perfectly on heaving soils with a large freezing depth.
The main drawback of the chain-link is a rather weak protection. It will not be difficult for a trained attacker to make a breach in such a fence by simply “biting” the wire with pliers. Nevertheless, it is quite difficult to overcome an obstacle made of a correctly tensioned mesh “at a swoop” due to its high elasticity and volumetric structure. Under mechanical action, the canvas bends and springs as a single surface.
Design options
Structurally, any chain-link fence requires a supporting structure. There are three main ways of installing the netting mesh on the supporting structure.
- tensioned, along a string or cable;
- hinged, along the guide lags (slugs);

- precast sectional method.
The most elastic are the tensioning structures of fences made of chain-link mesh.
The design of such fences is as follows: a wire (cable) is pulled between the support posts, to which the mesh fabric is attached. In practice, this process involves passing the tensioning element through the mesh cells along the bottom and top of the web. As a result, the structure is not rigid.
The advantage of the tension mounting method is the minimum consumption of materials.
Disadvantages: In case of freezing of the soil or significant mechanical influences on the supporting structure, some displacement of the pillars is possible - from a few millimeters to several centimeters.
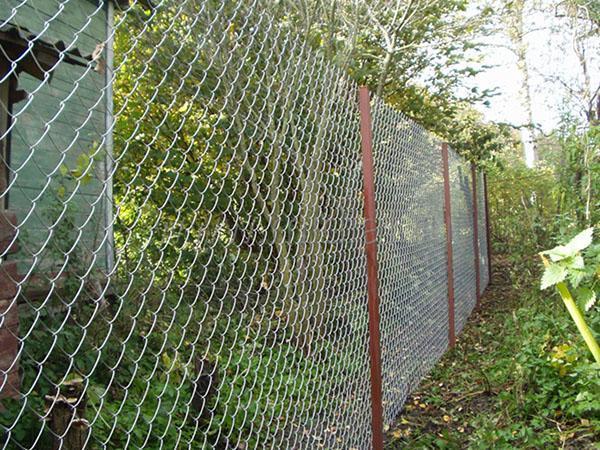
 The method of installing the mesh along the guides implies the presence of two parallel veins rigidly fixed between the support pillars.Instead of a string (wire, cable), guides made of a metal pipe or wooden bar are attached to the posts.
Advantages: this design makes the fence more rigid and solid.
Disadvantages: when the soil moves (on heaving soils), significant deformation of the fence is possible, which can lead to damage to its integrity. The problem is solved by increasing the depth of laying the support pillars below the freezing point of the soil for a particular region.
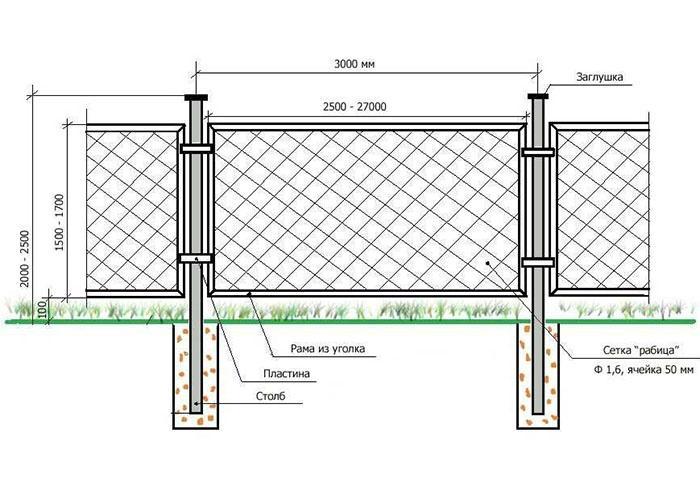 A sectional fence made of a chain-link mesh is made as follows:
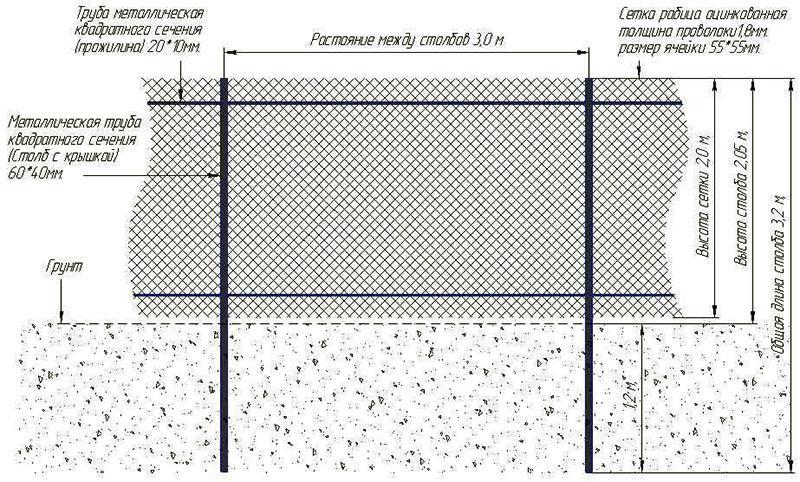
- Support pillars are installed along the perimeter of the fenced area. The distance between the posts is 2.5 - 2.7 m.
- With the help of a welding machine, frames are created from a metal corner, on which the mesh is attached.
- The finished sections are welded to the support posts.
Advantages of the prefabricated sectional construction: strength, aesthetic design, higher anti-vandal properties.
Disadvantages: such fences are expensive to manufacture and practically not maintainable. The rigidity of the structure requires an even greater depth of pillars, especially on heaving and clay soils. That is why sectional fences made of metal mesh are usually not considered by most of our compatriots as fences for private territory.
Material selection rules
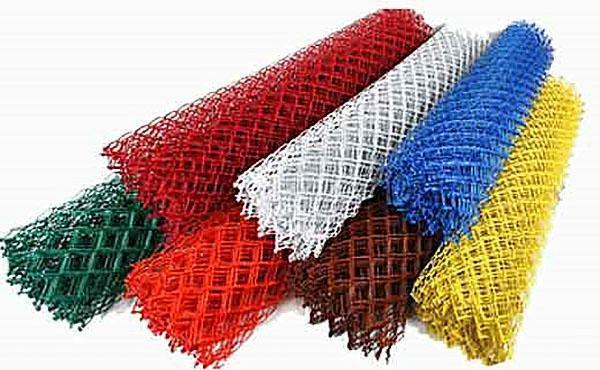
The aesthetics, durability and cost of the fence directly depends on the quality of the material. Today, the domestic construction market offers four types of chain-link mesh:
- Uncoated steel. The only advantage of this mesh is its low cost, which is offset by increased maintenance costs. This material must be painted annually to prevent corrosion.
- Galvanized metal mesh. Such material does not require staining, is resistant to weathering. The cost of a galvanized chain-link is almost twice as high as that of an analogue without a protective coating.
- Plasticized canvas. The metal of this mesh is covered with a polymer layer, which ensures a longer service life of the material.
- Plastic fencing is characterized by resistance to UV radiation and weathering, variability of the shape of the cells and colors. The main disadvantage is low tensile strength.
The assortment of the presented material is increased due to various mesh sizes, which can vary from 25 to 75 mm.
Experts recommend using a chain-link with a cell size from 40 to 60 mm for fencing the territory. These dimensions are due to the ideal ratio of price and load-bearing capacity of the mesh.
Work order
The installation of a chain-link fence begins with the creation of a support structure. Wooden, metal and concrete pillars are used as the main supporting element. Wood requires mandatory impregnation with an antiseptic. It is recommended to wrap the underground part of wooden pillars with roofing material or soak in resin. For the fence, you must use a bar or log with a diameter of 100 to 150 mm.
Concrete supports are one of the most inconvenient options for creating a supporting part of a fence. The canvas will have to be attached to the post using wire or clamps, which significantly reduces the protective and operational characteristics of the fence. Square metal posts with a cross section of 60x60 or 60x40 mm are the most suitable material for creating a supporting structure of a chain-link fence.
The order of installing the pillars is as follows:
- Supports are placed at the corners of the site.
- Two cords are pulled between them, along which the remaining elements are installed. The upper is used to determine the level; bottom to keep vertical. The distance between the supports is 2.5-3 m.
The corner posts will have a high load, especially when the mesh is tensioned.To increase the resistance to mechanical loads, it is necessary to provide jibs, which are rigidly fixed with corner supports.
The easiest way to install the pillars is to install them in a hole for filling with sand or gravel without concreting. It is this technique that allows water to be naturally diverted to the lower layers of the soil. When the soil freezes, moisture will not be enough to push out or at least somehow displace the support from the seat. The depth of the pillars usually does not exceed 1/3 of the total length of the support.
When installing the support pillars using the backfilling method (backfill with tamping), a drainage layer of rubble, 15-20 cm thick, must be provided at the bottom of the hole.
The simplest fastening of the web to the support structure is to "push" the mesh over its entire width onto a metal rod, which is welded directly to the corner (first) post. Further, on each pillar, pieces of thick wire or reinforcement are welded onto which (after some tension) a mesh is placed. After that, the pieces of metal are bent for the most reliable fixation of the canvas on the support pillars.
The second and more reliable method involves a tension mounting option. A wire is passed along the upper edge of the web (through each cell). You can, of course, screw it directly to the post, but the top of the net may sag. The use of special tensioners is recommended to prevent sagging. or lanyards.
If you choose a hinged structure along the guides, then you can attach the canvas to the logs using wire or plates welded to the guide.
In any case, it is necessary to fasten the canvas along the entire length of the log. When using plates, the distance between them should not exceed 70 cm.With point-based attachments to the guides, the rule should be observed: the distance between the fixation points should not exceed 25 cm.
As a conclusion
In this article, the main stages of self-creation of a fence from a chain-link mesh at a summer cottage were considered. As can be seen from the above, there are a great many options for the execution of the fence. The main thing is to competently approach the issues of creating a support structure and not save on materials. Use this publication as a guide and you will definitely succeed.