Making cups for seedlings with our own hands
All gardeners know that the summer cottage requires financial investments. Here you need to buy seeds and seedlings. Let's say you can grow seedlings yourself. But, again, the question arises - what to grow? Buying special cups for seedlings is also expensive, especially when growing on a large scale is planned. So, at this stage you can save a lot - make cups for seedlings do it yourself. And there is no need to buy material - at home there will always be old newspapers, cans, bottles, packaging, film. And in winter there will be something to do with yourself.
Material for cups for seedlings
As a raw material, there can be both ready-made containers and improvised means, namely:
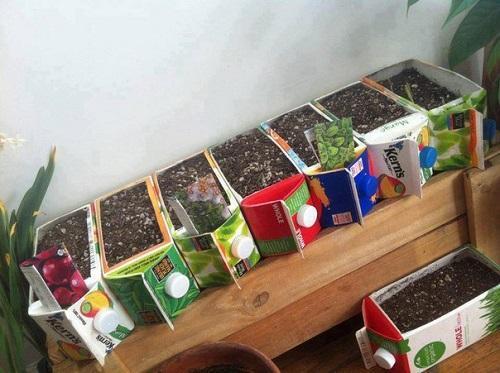
- Cardboard boxes of juice or milk, both small (for one seedling) and large (cut lengthwise and plant seedlings in groups).
- Large plastic cups for dairy products (small yogurt cups will not have enough space for the seedling).
- Disposable dishes (glasses).
- Used water bottles or bottles (they are treated in the same way as with cardboard boxes).
- Tin cans with preserves or beer.
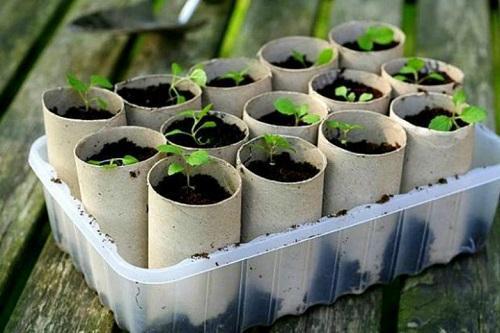
- Boxes made of cardboard (for example, shoe boxes) serve both for growing and as a pallet.
- Toilet roll cylinder (can be left round or square for convenience).
- Paper cups (newsprint or toilet paper).
- Film cups.
Since the ready-made container can already be used, we will focus on the last two points that require human participation.
Seedling paper cups
In order to make paper cups, you will need directly paper (newspapers, magazines) and a blank (base) glass. Used as a blank:
- a trimmed plastic bottle with a loop on the bottom (in order to make it easier to pull the blank out of the glass made);
- a tin can cut off from above.
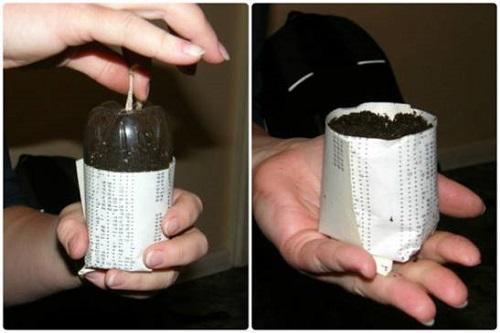
Cut strips of paper up to 40 cm long and 20 cm wide. Wrap the base for the glass with them so that the paper protrudes 5 centimeters beyond the edge. Then fold this protruding edge and make the bottom of the glass. Now the base can be carefully pulled out, and the cup itself can be fastened with paper clips or glued with glue for strength. Done! It remains only to fill in the prepared soil and you can plant seedlings. If you use toilet paper, then it is pre-moistened abundantly, and then dried well.

The advantage of paper cups is that they can be planted in the ground along with the seedling, the paper will decompose during the growth process and will not interfere with the growth of the root system.
Cellophane cups
Such cups are made using the same technology as paper cups, but with careful use they will serve more than once. To do this, twist the film strips into a cylinder and fix the bottom and walls with a stapler.
You can do even easier and buy wholesale cellophane bags for packaging. Fill them immediately with earth and put them in a box for stability. Such packages are pre-pierced from below so that moisture does not stagnate.
For more information on how to make do-it-yourself seedling cups, watch the video: