Original hanging balloons from petunia Spherica
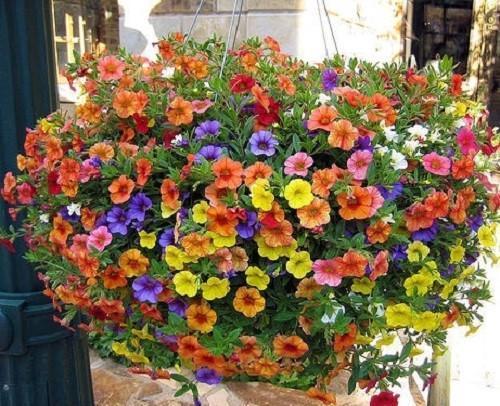 In what only petunias are grown by amateur flower growers: these are tall pots on a stand, and hanging pots, not to mention ordinary flowerpots or simple beds. However, for those who are fond of unusual ideas, there is another way to arrange plants. These are special round ball pots in which the seedlings are planted. When the flowers grow, they completely entwine the base. It seems that a living flower ball is hanging before the eyes.
Experienced craftsmen know the secrets of how to correctly make such beauty, and for beginners it will be useful to get acquainted with the master class outlined in the article.
What can you make a flowerpot ball?
To build a suitable structure, you will need 2 hanging pots with openwork frame-stands in the shape of a hemisphere. Instead of a flowerpot, special coconut fiber is embedded in them throughout the entire frame. The coconut insert can be removed immediately - no need for it.
To form a ball, it is recommended to use Spherica F1 petunia of different colors.
Step-by-step instruction
Further actions are as follows:
- In one of the hemispheres, remove several segments in the center.
- In both halves, using colored stickers, mark the places for planting petunias.
- Place a large plastic garbage bag in a whole hemisphere, and fill it with a nutrient medium. Lay the soil in layers, moisturizing each layer abundantly.
- As the pot is filled with soil, make holes in the package opposite the pre-set marks. Do not make them too large, otherwise the flower will simply fall out of the flowerpot.
- Into every hole plant petunia, inserting a bush along with an earthen lump. It is better to do this outside the flowerpot, gently pushing the root system inward so as not to break the plant.
- In one hemisphere, it is enough to arrange two rows of petunias. After planting the first row, fill up the soil, spill it and compact it.
- In a plastic bottle with a volume of 1.5 liters, cut off the bottom and make small holes throughout the bottle. This will be the so-called watering system. It must be installed in the center of the lower hemisphere, deepening into the soil with the neck down so that when the second half of the flowerpot is covered, the top of the bottle is opposite the hole with the removed segments.
- Fill the bag with soil to the height of the bottle, wrinkling it with your hands and shaping it into a semicircle. Cover with a second hemisphere and connect the two halves with a plastic tie.
- Compact the soil through the holes in the frame. Plant petunias in the upper part of the ball according to the marked marks. More plants can be added if necessary.
Hang the finished ball in a permanent place using the chains and hook that came with the hanging planter.