Orchid transplant: how to do it right
 All indoor flowers need periodic replanting, and the orchid is no exception. Time passes, and the small bush grows, it becomes cramped in the old flowerpot, besides, after a year or two, the substrate can no longer provide the epiphyte with food, despite the feeding. If you do not change the ground for a flower and increase the space for development, it begins to ache and wither. How to transplant an orchid correctly and when is it better to do it?
Read on:orchid transplant at home step by step!
Transfer time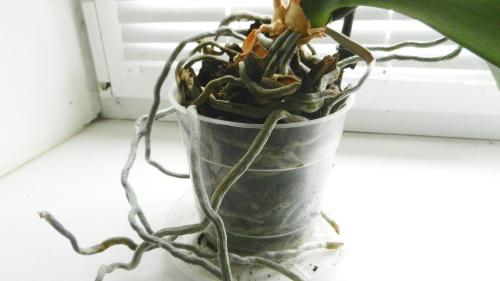
It is best to replant orchids in the spring, when growth processes are activated. The orchid tolerates spring transplantation most easily and quickly adapts to new conditions.
However, it often happens that there is no way to wait for spring, and in order to save a flower, you have to disturb it in autumn or winter.
The fact that the orchid needs an urgent transplant is indicated by the following signs:
- the appearance of mold on the surface of the substrate;
- wilting of the bush;
- putrefaction leaves or roots.
In such cases, waiting is fraught with consequences and there is no point in waiting for the spring period.
If there is an urgent need to transplant a flowering orchid, then a couple of days before the procedure, the peduncle should be cut off - the plant will need all its strength to restore, but it will only take them away and there is a risk of losing the plant.
Orchid transplant step by step
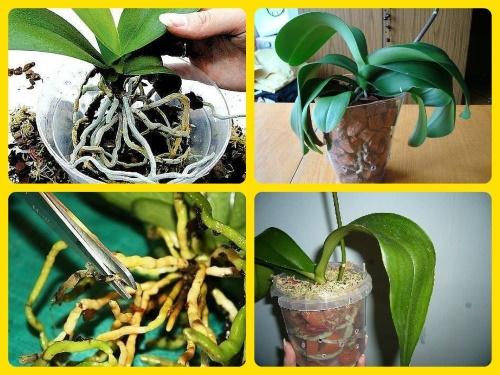
In the process of growth, the root system of the orchid tightly intertwines fragments of the bark, so the procedure must be carried out very carefully and consistently, namely:
- Grasping the outlet with your fingers, remove the bush from the flowerpot along with the soil. If you cannot do this at once, you can walk around the plastic container, squeezing it with your hands. Otherwise, you will have to cut the flowerpot or sacrifice several roots if the pot is dense.
- Rinse all the roots under the tap, freeing them from the remnants of the bark - you can get rid of the old soil, and the condition of the roots will be clearly visible.

- With the help of scissors, cut off all thread-like and slippery roots - the first have already dried up, and the second have rotted, and there will be no benefit from them. If the spine is half rotten, cut off only the damaged part. Only healthy roots should remain - firm and green.
- Dry and yellowed lower leaves must also be removed. To do this, cut the sheet lengthwise into two parts and carefully unscrew each.
- In order to prevent the roots, rinse in a solution of potassium permanganate.
- Sprinkle all sections with crushed activated carbon.
- Leave the orchid for 6-8 hours to dry well.
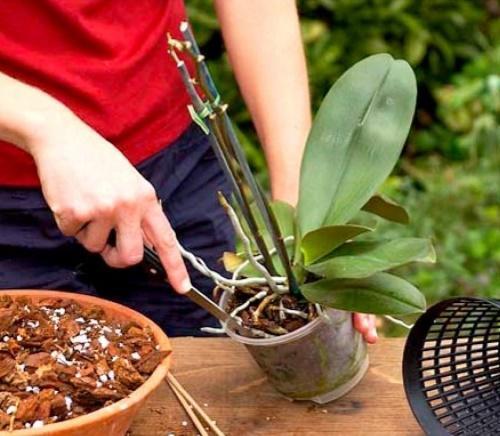
- When the bush is dry, pour a little drainage on the bottom of the flowerpot and set the orchid in the center. It remains only to fill the roots with fresh substrate, gently distributing it between them with a stick. There is no need to tamp the bark, so as not to damage the flower - over time, it will take a "comfortable position", and if necessary, soil can be added.
When transplanting an orchid with a large number of aerial roots, some of them can be placed in a pot, especially if the main root system has been severely damaged and cut off, but there is no need to shove them all into a flowerpot.
The transplanted bush for the first two weeks should be placed in a shady and cool place (no more than 20 degrees Celsius). The first watering can be carried out not earlier than 5 days after the procedure, using the immersion method.